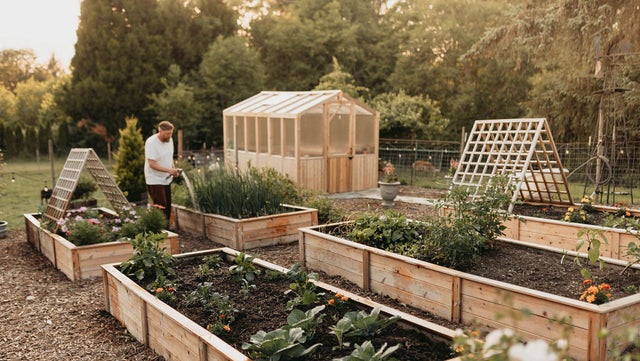

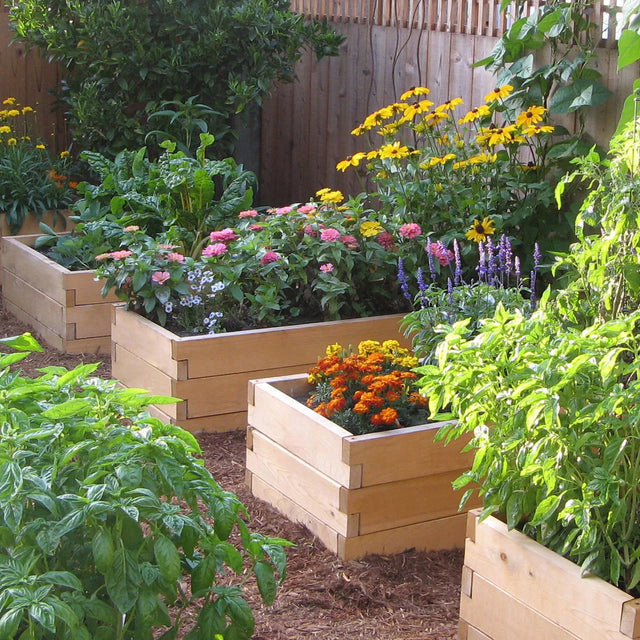
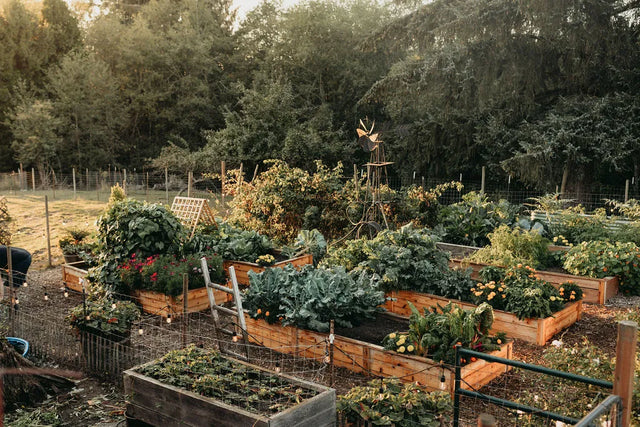
With 'no-till' gardening, once the bed is established the surface is never disturbed.
This article has been updated from its original text.
Gardeners often dig, or turn over, the top layer of soil before planting to get rid of weeds and make it easier to use fertilizers and plant crops. This also speeds up the decomposition of crop residue, weeds and other organic matter. Tilling the soil is often the most strenuous of a gardener’s tasks.
Digging into garden beds can interfere with natural processes and disturb the growing environment.
A complex, symbiotic relationship exists between the soil surface and the underlying micro-organisms, however, which contributes to a natural, healthy soil structure. Digging into the bed can interfere with this process and disturb the natural growing environment. It can also cause soil compaction and erosion, and bring dormant weed seeds to the surface where they will sprout.
With ‘no-till’ gardening, once the bed is established the surface is never disturbed. Amendments such as compost, manure, peat, lime and fertilizer are ‘top dressed’, i.e added to the top of the bed where they will be pulled into the subsoil by watering and the activity of subsoil organisms. Weeding is largely replaced by the use of mulch. By adding material in layers, the underlying soil surface remains spongy, making it easy for the young roots of newly planted seedlings to work through the soil. This is similar to the way soil is formed in nature.

Benefits of no-till gardening
Promotes natural aeration and drainage.
Worms and other soil life are important to healthy soil structure, their tunnels providing aeration and drainage, and their excretions bind together soil crumbs. No-till systems are said to be freer of pests and disease, possibly due to a more balanced soil population being allowed to build up in this comparatively undisturbed environment, and by encouraging the buildup of beneficial soil fungi.
Saves water.
Thick layers of mulch allow water to pass through easily while shading the soil. This reduces water lost to evaporation while maintaining a moist growing environment beneficial for root growth.
Reduces or eliminates the need to weed.
Most garden soils contain weed seeds which lay dormant until the soil is disturbed and the seeds become exposed to light. With no-till gardening, these seeds will remain dormant indefinitely. Of course, some weeds will appear in the beds, borne by wind or birds. These weeds are easy to remove by hand if you pull them early in the morning or shortly after watering, while the soil is damp.
Saves time and energy.
Whether you turn your garden beds by hand or use a gas-powered rototiller, you’ll save energy by using the no-till method. Although some effort is required in gathering materials for mulching, and applying the mulch during the growing season, no digging or turning of the soil is required.
No-till gardening helps soil retain carbon.
Healthy topsoil contains carbon-enriched humus and decaying organic matter that provides nutrients to plants. Soils low in humus can’t maintain the carbon-dependent nutrients essential to healthy crop production, resulting in the need to use more fertilizers. Tilling the soil speeds the breakdown or organic matter, which releases nutrients too quickly. A steady, slow release of nutrients is more beneficial to plant growth.
Builds earthworm population.
The moist conditions of the soil beneath mulch creates the ideal environment for earthworms, whose activity aerates the soil and stimulates root growth.
Helps reduce soil erosion.
A lack of carbon in soil may promote erosion, as topsoil and fertilizers are often washed or blown away from garden beds.

Soil Test Kit

Methods used in no-till gardening
Prepare the bed before adopting the no-till method.
With new garden beds you need to establish a good, fertile soil structure before you can expect good results with the no-till/mulch method. The soil should be ‘double-dug’ at least the depth of two shovel blades, and large rocks, roots and other obstructions removed. Be sure to remove any perennial weed roots. Amendments such as peat, lime, vermiculite, compost or other organic material can then be worked into the soil.
Use mulch liberally, in layers.
Mulch is an essential part of no-till gardening. A thick layer of mulch will keep the soil from drying out and crusting over, which restricts nutrient and water flow to the subsoil. It also reduces water loss due to evaporation.
Mulch will provide cover for soil insects and often dramatically increases the earthworm population. However, mulches can also introduce weeds to your garden bed. For example, try to use straw instead of hay because fewer weed seeds are found in straw. Leaves, especially from deciduous species such as Maple, add valuable nutrients to the soil but should not be layered too thickly. Thick layers of leaves can form ‘mats’ which restrict water penetration and harbor insects. You can intersperse layers of straw with leaves, for example, to prevent matting.


When planting seedlings, pull the mulch back and dig into the surface just enough to set the plant.
The depth of mulch can be only a few inches when seedlings are first planted, then added in layers as the plant grows. Pull mulch away from the stems of tomatoes, peppers and long-stemmed plants. Beds left over winter can benefit from mulch 12″ – 24″ in depth.
Related: Raised Rows – The Best No-Till Method
The following lists common materials used for mulches:
- Grass Clippings – Cut grass before it goes to seed. Fresh ‘green’ clippings will add nitrogen to the soil, which helps plants grow. If you let the clippings turn brown, you will get the mulch effect without adding nitrogen. (As plants begin to fruit, nitrogen should not be added.)
- Newspaper – Avoid using paper with colored inks; can blow away in the wind.
- Yard waste – Cut up any branches or woody material.
- Compost – Needs to be ‘finished’ compost so as not to attract pests. Compost is a good early season mulch, but as the plant begins fruiting, you should withhold sources of nitrogen.
- Hay – Good mulching material but beware – weed seeds may be introduced.
- Straw – Good source of carbon; excellent mulching material.
- Seaweed – Adds trace minerals, deters slugs. Should be applied liberally because seaweed shrinks considerably when dry.
- Fine bark – Can be acidic. You may need to add lime at the same time.
- Wood Shavings – Avoid shavings from chain saws or tools that leave oil residues.
- Leaves – A valuable source of carbon, leaves make excellent mulch. Apply in thin layers, or intersperse with other materials to prevent matting. Sprinkle soil on top if needed to prevent leaves from blowing away in a strong wind.
- Forest duff – Pine needles, twigs, woody bits are useful, but can be acidic.

‘Top dress’ amendments.
Even a well-established garden bed will need regular amendments added during the growing season, and in spring and fall. Compost, peat, lime, wood ashes and other material are easily added to the bed without digging them in. Spread this material around the plants where needed, and add mulch to cover.

Premium Amendment Bundle – Organic Worm Castings, Biochar & Mycorrhizae
Cut back on watering.
The use of mulch retains moisture, thereby reducing the need for frequent watering. Reduced watering also helps minimize soil compaction and the germination of unwanted weeds. Drip-irrigation techniques are very helpful in this regard because water is delivered to root zones, without being wasted on unplanted areas or pathways.
Cover crops
These can be planted during the off-season for a garden bed as a way of discouraging weeds from becoming established, and to return essential nutrients to the soil. Crops such as crimson clover, oats, rye and hairy vetch are referred to as ‘green manures’ because of the fertility they add to the soil. Rye should not be planted preceding small-seeded crops like onions or carrots.
To replant a bed which has been planted in a cover crop, lay dark plastic sheeting over the bed and weight down the edges with rocks. Heat will build sufficiently to kill the plants, then vegetable seed or transplants can be set out after removing the plastic. Ideally, allow two weeks before planting to allow crop residues to break down, releasing nitrogen for the new seedlings. This method takes time, however, and can conflict with the spring planting schedule. Another method is to hand pull the cover crop where you want to place the seedlings, and cover the remaining cover crop with a thick layer of mulch. Another method is the cut the cover crop to a stubble, then gently work the stubble into the soil with a hoe. This process compromises the ‘no till’ method, but can still be sufficient to allow early planting.

Winter cover with hay.
A simpler alternative to planting cover crops is to place a thick layer of straw and leaves over the garden beds for the winter months. This layer needs to be deep, as much as 2′ deep, to keep weeds for sprouting. In the spring, the pile will be lower. When ready to plant, the mulch can be simply pulled back to dig the hole with a hand spade for the plants. Some gardeners report this method encourages voles and other pests who nest in the straw and burrow into the soil. It is best to experiment with this method on a small part of your garden to ensure its effectiveness in your growing region.
Avoid compacting the soil.
Avoid stepping on the bed, as this compacts the soil. If the bed is wider than 4′, a board or stepping stones can be set in place on the bed. If a board is used, flip it over occasionally to allow the underside to dry out and to expose any slugs or snails.
It should be noted that “no-till” does not mean “no-work”. As the mulch breaks down and settles into the soil, new mulch needs to be added. This should be done in a timely way, because if the soil surface is exposed to direct watering, and heavy rain, it compacts. You may need to break up (till) the soil before planting the next crop, and this defeats the purpose of the no-till method.
In conclusion, no-till gardening requires some experimenting to find the right techniques for your growing region. Ideally, one or two ‘extra’ beds in the garden can be used for testing cover crops and spring planting methods. Over time, the remaining garden beds can be transitioned to no-till. If you have a good supply of mulching materials and reapply them as necessary throughout the growing season, you can enjoy the benefits of a productive garden with less work in the spring, less weeding and less water used throughout the summer.
References:
- One-Straw Revolution, by Masanobu Fukuoka
- The Secret Garden, by David Bodanis
- Gardening Without Work: For The Aging, The Busy, and The Indolent, by Ruth Stout, Lyon Press (1998)
- Weedless Gardening, by Lee Reich, published by Workman Publishing (2001)
 Responses (32)
About the Author
Greg Seaman
Originally from Long Island, NY, Greg Seaman founded Eartheasy in 2000 out of concern for the environment and a desire to help others live more sustainably. As Editor, Greg combines his upbringing in the cities of New York, Boston and San Francisco with the contrast of 31 years of living ‘off-grid’ to give us a balanced perspective on sustainable living. Greg spends his free time gardening, working on his home and building a wooden sailboat with hand tools.